Painting Company Irving Texas: Transforming Houses with Precision
Wiki Article
Seamless Shifts: Expert Drywall Repair Service Techniques to Attain a Smooth and Sleek Look
Are you tired of looking at those unsightly splits and openings in your drywall? Look no more - this write-up has actually obtained you covered. We will certainly guide you with the seamless shifts and expert methods required to accomplish a refined and smooth search for your walls. From preparing the surface to using the final layer of joint substance, you'll find out all the detailed guidelines to make your drywall appearance new again. Roll up your sleeves and get all set to change your space with these specialist drywall repair work techniques.Preparing the Surface Area
Before you start repairing the drywall, make certain you've thoroughly cleansed the surface to remove any type of dirt or particles. This step is important in accomplishing a smooth and polished search for your fixed drywall. Start by utilizing a broom or vacuum to get rid of loosened dust and particles from the damaged location. Next off, take a moist towel or sponge and gently clean down the surface to eliminate any staying dirt or gunk. Pay very close attention to the edges of the damaged location as they tend to gather more dirt. You may require to make use of a mild cleaning agent or cleansing service to eliminate them if there are any kind of greasy or oily spots. Once the surface is tidy, allow it to dry totally prior to waging the repair work. Keep in mind that a clean and smooth surface area is crucial for a successful drywall repair service, as any kind of staying dirt or particles can impact the bond of the patching product. Take your time to ensure that the surface is appropriately cleansed prior to going on to the next step.Patching and Filling Up Openings
When you have actually patched and filled up openings, fining sand the area will produce an extra even surface. Fining sand is an essential step in accomplishing a smooth and polished search for your drywall fixing. It helps to blend the patched locations with the rest of the wall surface, ensuring a seamless shift.
To start, you'll require to gather the necessary devices: a sanding block or sandpaper, a vacuum cleaner, and a dust mask. Place on your dirt mask to shield yourself from inhaling any kind of dust particles that may be launched throughout the sanding process. Attach the sandpaper to the fining sand block or utilize it directly with your hand, ensuring a firm grip.
Maintain an eye out for any rough edges or unequal places and focus on smoothing them out. As you sand, regularly inspect the surface with your hand to guarantee it feels smooth to the touch.
Once you've finished the fining sand process, utilize a vacuum to remove the dust fragments from the location. This will certainly avoid the dust from kicking back onto the surface and wrecking your effort. Take a moment to examine the sanded location and make any needed touch-ups prior to proceeding to the next step.
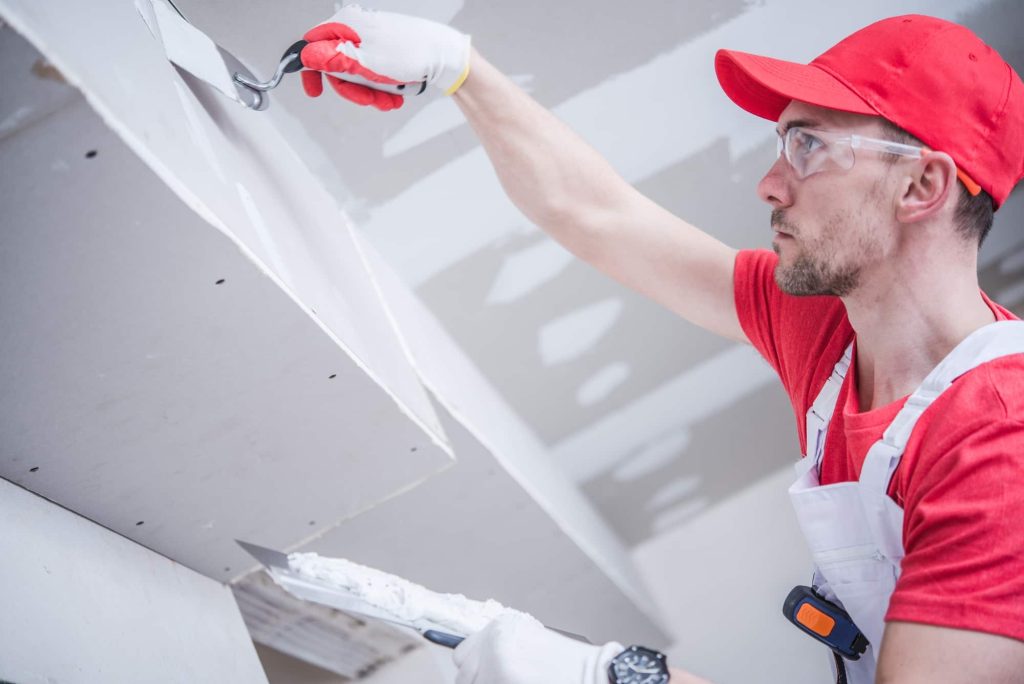
Using the First Layer of Joint Substance
To start using the first coat of joint compound, collect the essential tools and make sure you have a smooth and also surface to function with. This step is vital in accomplishing a smooth surface for your drywall repair work. Begin by collecting your materials: a putty blade, a drywall sanding block, and a pail of joint substance. It is very important to have a putty blade with a flexible blade to conveniently spread the compound. Prior to you start, evaluate the area you will fix. Ensure that there are no loosened or protruding pieces of drywall. If you see any type of imperfections, utilize a fining sand block to smooth them out. Dip your putty knife into the joint substance and load it up when you have a tidy and even surface. Beginning by using a thin layer of substance over the damaged area, utilizing smooth and also strokes. See to it to feather the substance out past the edges of the repair to blend it flawlessly with the bordering wall surface. After the initial coat is applied, enable it to dry totally prior to going on to the next action.Sanding and Smoothing the Surface
Smooth out any kind of rough patches or bumps on the surface area by using a sanding block. Once you identify these spots, get your fining sand block and gently sand the surface. This will certainly aid to level out any kind of high spots and develop a smooth surface area for the next layer of joint compound.
After fining sand, run your turn over the covered locations to examine for smoothness. Repeat the sanding process up until the surface area feels completely smooth if you still feel any rough patches. As soon as you're pleased with the results, clean away any kind of dirt with a clean, moist fabric or sponge.
Completing Touches: Priming and Painting
After wiping and fining sand away any dirt, it's time to prime the surface area prior to applying paint. Priming is an essential step in achieving a lasting and professional surface for your drywall repair work. By applying primer, you develop a smooth and also base that helps the paint adhere far better and guarantees a constant color throughout.To start, gather your materials: a high-grade primer, next page a paintbrush or roller, and a tray. Ensure the surface is tidy and dry prior to beginning. Open the primer can and provide it a great mix to mix the materials extensively.
Dip your brush or roller right into the primer and get rid of any type of excess by lightly tapping it on the side of the tray. Begin using the primer in smooth, also strokes, working inside out. Ensure you cover the entire repaired location and extend slightly past it to mix with the surrounding wall.
Permit the guide to completely dry completely according to the manufacturer's instructions. painting company Irving Texas. This typically takes regarding 1-2 hours. Once dry, examine the surface for any kind of imperfections. Lightly sand any rough areas with a fine-grit sandpaper and wipe away any type of dust before proceeding to the next step. if needed.
Currently, you're all set to use the paint! Select a premium paint that matches the existing wall shade. Use it in the same way as the primer, making use of smooth and also strokes. Relying on the color and kind of paint, you might require to use multiple coats for complete coverage. Enable each useful reference layer to completely dry completely before using the following.
Verdict
By complying with these steps, you can effortlessly transition from a damaged wall surface to a perfect surface area. Keep in mind to effectively prepare the surface area, patch and fill up any holes, use several coats of joint compound, and sand and smooth the surface.As you sand, occasionally examine the surface with your hand to ensure it feels smooth to the touch.
Smooth out any type of harsh patches or bumps on the surface by making use of a sanding block. As soon as you identify these areas, grab your sanding block and gently sand the surface (sheet rock contractor Irving Texas). If you still really feel any kind of rough patches, repeat the sanding process till the surface area really feels entirely smooth. Bear in mind to appropriately prepare the surface area, patch and fill up any holes, apply several layers of joint substance, and sand and smooth the surface area
Report this wiki page